
Reducing tillage means exactly what you think — making fewer passes through the field and/or decreasing the intensity of the passes. Dialing back tillage can increase energy savings, water-holding capacity, soil biological activity and organic matter as well as reduce compaction.
Jodi DeJong-Hughes, a University of Minnesota Extension regional educator, believes it doesn’t have to be no-till or nothing — every farmer can reduce their tillage.
“Reduce the number of passes, reduce how aggressive the machine is or reduce the depth it goes into the soil,” she says.
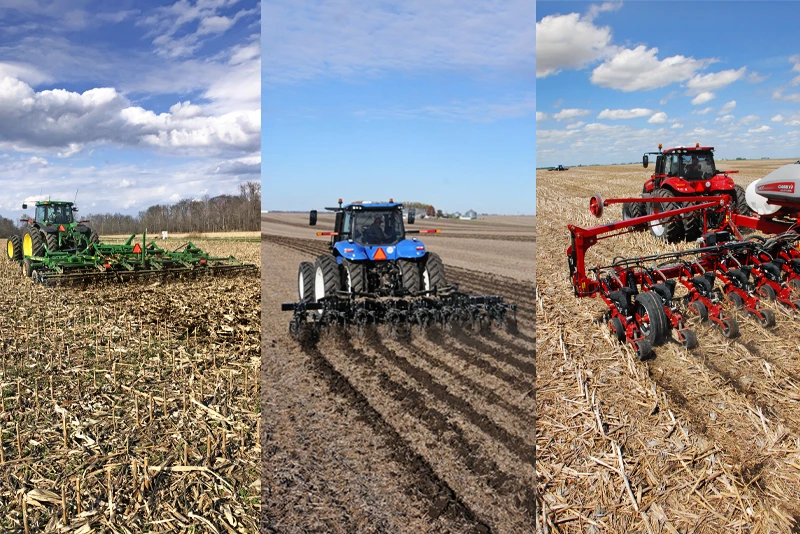
There are several reduced tillage practices, including:
- vertical-till
- strip-till
- zone-till
- no-till
As a general rule of thumb, reduced tillage should leave at least two thirds of the surface covered with residue after planting.
The biggest hindrance for many people isn’t soil, according to DeJong-Hughes. It’s tradition. Especially for those who tried to reduce tillage a long time ago to no avail, it’s easy to be discouraged from trying again. However, in the past 15 years a lot has changed, including equipment, seed genetics, seed treatments and weed, disease and insect resistance.
Switching from conventional tillage systems to reduced tillage can be challenging. Here are some tips from new and veteran reduced tillers:
- Use a chopping corn head to make residue more manageable.
- Get fertilizer placement right, which might mean at planting.
- Be prepared to plant later.
- Consider experimenting on a small number of acres first to avoid operation-wide mistakes.
- Know location and weather constraints for no-till
- Use effective residue movers during planting.
- Be realistic about how many acres you can no-till or strip-till.
What Is Vertical-Till?
The concept of vertical tillage is well-known, but what it entails isn’t fully understood in some corners of farm country. In simple terms, Ken Ferrie, Farm Journal field agronomist, says a true vertical tillage system involves understanding the soil profile, addressing compaction issues, ensuring each pass achieves the goal of the system, respecting residue cover and providing a well-prepared seedbed for the planter pass. Simply put, a vertical system means managing the entire soil profile for uniformity.
Vertical tillage tools have deep-digging shanks that break up compacted layers of soil, eliminating the density change layer put in place by horizontal tillage. Tools include: in-line rippers, chisel plows, disk chisels and disk rippers, which are used with harrows in the spring to level the surface without putting in horizontal layers.
How Deep Does Vertical Tillage Go?
Determining how deep to run fall tools depends on the depth of your topsoil.
“Running 15" deep works great in deep topsoil, such as in central Illinois,” Ferrie says. “But in other areas, running that deep will break shanks and bring up rocks.”
In very shallow soil, deep tillage is only 7" to 8" deep. So, you’re limited mostly to chisel plowing.
To get uniform shatter with vertical tillage tools, the depth must equal half the distance of the shank spacing. In other words, if you want to run a chisel plow 7" deep, place the shanks on 14" or 15" centers. It’s important to get shattering all the way across.
“If you can only pull an in-line ripper 11" deep, stop and pull the shanks in so you get shattering all the way across,” Ferrie says. “Or switch to a chisel plow or disk ripper.”
The later you do vertical tillage, the tighter the window. Disk rippers, disk chisels and chisel plows provide a bigger window than in-line rippers because they work in wetter conditions.
“Uniform shattering is easier to attain with disk rippers and disk chisels because we have many shanks,” Ferrie says. Because uniform shattering is a function of depth, shank spacing, speed and soil moisture, you might have to set the machine for each field.
Because chisel plows, disk chisels and disk rippers have staggered shanks, they leave a pattern of peaks and valleys of untilled soil beneath the surface. “The peaks should be no closer than 4" to 5" from the surface,” Ferrie says. “Otherwise, you’ll wind up planting into peaks of unworked soil.”
Fall Fieldwork Must Leave A Level Surface
With fall vertical-tillage tools, you want to leave the surface as level as possible because you will replace secondary tillage with harrows. You can add leveling devices to the rear.
“In some cases, when there is a horizontal layer, the soil wants to flip up like gravestones,” Ferrie says. “Usually, this happens the first time a farmer runs a vertical-tillage tool. Leveling devices can solve the problem.”
You want to come out of winter with peaks and valleys no deeper than 3". Deeper valleys lead to herbicide streaking, and dry peaks and wet valleys make it difficult to get soil uniform for planting.
Select chisel points based on what you want to accomplish.
“To leave residue, run a straight point and move the shanks in closer,” Ferrie says. “To bury residue, use twisted shanks with a cutter on the front of the tool. Straight cutters leave more residue on the surface; slightly concave cutters seize and bury some of the residue.”
Final leveling is done in the spring, using a leveling harrow.
“They do no horizontal tillage — just level the surface,” Ferrie says. “They don’t bury residue. If residue is a concern, you must decide how much residue to bury with your primary tillage.”
Vertical-tillage harrows are designed to run 7 mph to 12 mph. Tractors and sprayers should be equipped with flotation tires because there will be no opportunity to remove compaction caused by wheel tracks.
Spring Fieldwork and Planter Considerations
When you run your harrow in the spring, you’ll find out how good a job you did with your primary tillage.
“If the tractor rocks, you didn’t go deep enough; the peaks and valleys are too close to the surface,” Ferrie explains. “If you did it right, you should be able to drink a cup of coffee as you go across the field. You might fight to steer the tractor because of the softness of the soil, but you won’t bounce.”
Ferrie adds: “If you did a good job of primary tillage, it should be easy to set the right down pressure on your planter units. If you didn’t, it will be almost impossible because there will be hard and soft spots.”
With vertical tillage, you must have row cleaners on your planter because you are dealing with more residue than in conventional tillage.
What Is Strip-Till and Zone-Till?
If you farm in a wet or cold climate but want to minimize soil disturbance, consider strip-till or zone-till. Both tillage systems are just a step away from no-till. Strip-till is done 6" or 7" deep; zone-till uses parabolic shanks to go even deeper.
“Both systems break up horizontal layers, but zone-till takes more horsepower than strip-till,” Ferrie says. “With either system, you don’t eliminate compacted horizons, but you do create pathways for roots.
“Strip-till works when 80% of a field is ready to plant, but 20% is too wet. It is ideal in shallow soil where deep tillage hits rocks, and it allows poorly drained soils to warm faster. It’s a modified no-till program for use as we move north.” he adds.
The biggest obstacle to strip-till is building strips in a timely manner in the fall. This becomes a bigger problem as you move north into northern Iowa or Minnesota where the ground might be frozen when you finish harvest.
You need a person and a tractor available to run the strip-till rig while harvest is underway, Ferrie advises.
“If you harvest all your corn and soybeans first, you may wind up strip-tilling in the mud,” Ferrie says. One way to solve that problem is to hire a custom strip-till operator.
If you farm in an area suited for fall nitrogen application, applying nitrogen when you strip-till makes the practice more feasible. However, there’s a catch.
“Soil must be dry for shattering and building the ridge, and that usually occurs right after soybean harvest,” Ferrie explains.
Timing is Key When Building Strips
“Building the strip at the right time is an important factor to having a good seedbed next spring,” Ferrie says. “On the other hand, that might not be the best time to apply nitrogen. If you lose it, it’s harmful to the environment, and you’ll have to apply more later.
“If it’s too warm, you’re better off to shut off the nitrogen and build the ridge while it’s dry and apply nitrogen later. You can still apply phosphate and potash,” he adds.
Some farmers can’t do strip-till without nitrogen because the bar they use belongs to a fertilizer company, which insists on nitrogen use. Buying your own bar might not be practical because of the cost.
“Once strips are in, the biggest problem is staying on the ridge when you plant in the spring,” Ferrie explains. “The person who makes the strips should also run the planter or use auto-steer. I recommend auto-steer if a custom applicator makes your strips.”
The better you stay on the strips, the easier it will be to set your planter, he adds. And, the more residue you move off the strip in the fall, the easier it will be to plant.
You Must Have a Backup Plan
“If the soil is wet, the strip-till bar will cut slots,” Ferrie says. “It will look like a ridge, but smears in the knife slot will still be there next spring. When someone strip-tills too wet, seeds fall 3" to 5" down in the slot. There may not be enough of them to hurt population a great deal, but it will hurt ear count due to uneven emergence. High ear count is a key to high yield.”
For plan B, Ferrie suggests moving strip-till to the spring.
“If you do that, don’t apply anhydrous ammonia,” he cautions. “Switch to a nitrogen solution, or pull the bar and apply your nitrogen later. We’ve built strips in March and early April, and when we got rain to settle them we got a decent seedbed.”
But in dry years, spring strips may dry out too much, leading to germination problems.
“If we make strips in early April and it doesn’t rain, we’ll no-till off to the side of the strip,” Ferrie says. “If it’s too dry to plant in the strips, it’s dry enough to no-till.”
Before moving into strip-till, ask yourself:
- Can you manage disease?
- Are you willing to take the time to adjust your planter for conditions in each field?
- Can you control gully erosion in strips on rolling ground?
- Can you control weeds with a burndown herbicide?
- How will you manage traffic so you don’t drive over the strips with herbicide and fertilizer applications.
Equip your planter as you would for no-till.
“If the ridge is uneven, your planter must be able to roll dry soil back into the ridge and level it,” Ferrie says. “I prefer floating row cleaners with depth-band wheels so they stay engaged all the time.”
Balance pH before moving to strip-till, he advises, because you will no longer be mixing soil. After you begin strip-tilling, apply smaller lime applications more frequently.
What Is No-Till?
No-till is similar to strip-till and zone-till, but it requires more management. Farm size often is an issue.
“Some of the most profitable farms I know use no-till,” Ferrie says. “But they are sized and equipped to plant in a timely fashion. With 7,000 acres, when you’re farming 35 miles from home, you can’t wait for a field to dry.”
Before committing to no-till, ask yourself: Can you manage weeds and disease without tillage?
“As with strip-till, you need to control the first flush of weeds with a burndown herbicide instead of a soil finisher,” Ferrie says. “In addition, you may need to apply a burndown treatment in the fall.”
Disease becomes a bigger issue, especially as you move south from the latitude of central Illinois.
“If you select genetics for disease resistance, scout fields and know when to spray fungicides, you’ll be OK,” Ferrie says.
Continuous corn is not impossible with no-till, but it is more difficult, especially as you go north.
“From central Illinois south, you get more residue decomposition during the winter,” he explains. “Never plant the same genetics back to back.”
Your planter must be equipped to handle residue.
“The idea that you’ll just give no-till a shot without row cleaners and adequate down pressure is a recipe for failure,” Ferrie says.
As with strip-till, balance pH, phosphorus and potassium before you start no-tilling. Then make frequent, smaller lime applications.
Be flexible and patient with the decision making. “I know farmers who have been successful with no-till for decades,” Ferrie says.
“But if they get in trouble — from a wet fall that results in compaction or a manure application that causes wheel tracks — they go back to vertical tillage to eliminate the problem. They may have to do that every five or six years.”
For first-timers, Ferrie recommends spending up to three years preparing soil for no-till planting.
“The first step is to dig in your field and examine soil structure and root growth to identify dense layers,” he explains. “Remove them by using cover crops with roots that can penetrate compacted layers and stabilize new pores, equipment or a combination of both.”
No one knows better than you that the future of your farm depends on balancing practices and profits that sustain your land, resources and family. The stakes are evolving based on weather patterns, technology, market demand and more. What actions are you taking to remain resilient?